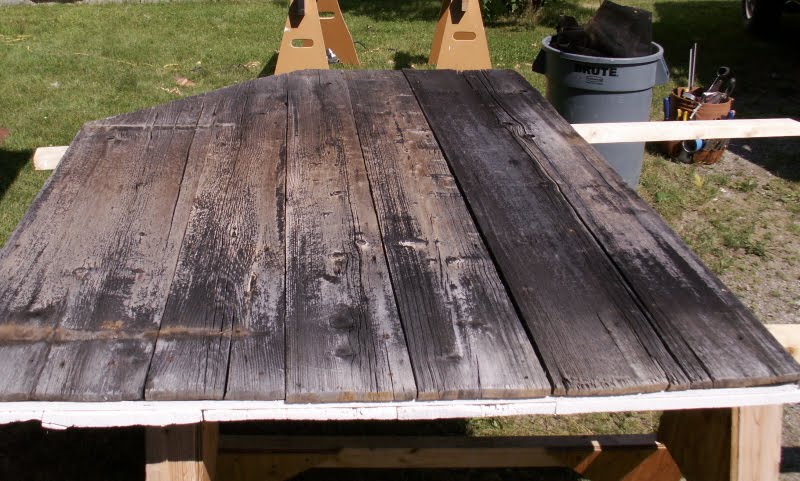
Before:
And after:
Contrary to the title, this is not a primer on how to hide oneself
a la Monty Python, rather it is about how the Museum carpenters try to make their repairs invisible. In an earlier post I described how I built a brand-new replica of an historic building component, a willful departure from the original materials and appearance; this time I will show you how I rebuilt a door on the Weaving Shed and tried to make it look like I had never been there at all.
The problem at hand was that both doors had sagged downward and were binding on the threshold. A lot of force was needed to get them closed, and as a result the doors were severely racked on a twice daily basis as the building was opened and closed. Constructed of two layers of vertical barn boards nailed (with square nails) to a plywood core, the doors had the structural integrity of a fish's tail and made a similar motion as they moved. The boards had split exactly four feet out from the hinges. Since the doors are five feet wide, and a sheet of plywood is only four, there was a vertical seam in the plywood at this point. This weak point also corresponded to the drip line of the roof:
Since the doors are open rain or shine (when the Museum is open), the doors were getting a bit punky as a result of periodic watering.
Here I've removed the exterior boards and you can see the awesome fungus growing on the tar paper that covers the doors' plywood core:
And here you can see that the plywood was rotted as well:
Note the vertical plywood joint near the right edge: the inner sheathing board had split lengthwise directly over this line. There was tar paper on both sides of the door (under the barn boards): on the exterior to prevent water from penetrating the building; on the interior so the plywood wouldn't be visible through cracks and knot holes. This wood-tarpaper-plywood-tarpaper-wood sandwich trapped and held water from the roof in the middle of the door, hence the fish-tail action.
You're probably thinking, "Hang on a minute, what are modern materials like plywood and tar paper doing on such an old building???"
The Weaving Shed was built in 1955, but it looks much older because it was constructed of old materials the Museum crew salvaged from other structures in the region, leftover parts from other projects, and/or materials that were purchased specifically because they were old and unique (We still have stockpiles of wide barn boards, bricks, square nails, roofing slates, figured hardwoods, etc.) We can only speculate as to the exact time period that this building was intended to represent, but at first glance it looks like it's from the early 19th century. Closer inspection reveals some very contradictory clues...more on that later.
In order to replace the rotten plywood I had to completely disassemble the door. I decided to take the opportunity to make a few design changes. I also made the new plywood core from two pieces, but oriented the seam horizontally. This way the two layers of barn boards would act as battens to hold the door together. The cracked inner sheathing board was 17-inches wide. To get a replacement I dug around in the carpenter shop attic until I got one I liked, ripped it to width and cut it to length (Yes, it was
too wide at 18.5 inches!) I laid out the interior boards on my saw horses with the whitewashed inner faces down and glued and screwed the new plywood to them with construction adhesive and short decking screws:
I had attached a strip of Vycor self-adhesive rubberized flashing tape to the top edge of the plywood core, first sticking it to the inner face and leaving the release paper on the rest of the strip. After fastening the plywood to the interior boards I covered the outer face of the plywood with tar paper and lapped the Vycor over the top:
This way, any water that drips from the roof will run over the Vycor and down the tar paper rather than soaking into the plywood core. I nailed the exterior boards on over the tar paper, again using square nails:
I then flipped the door over and replaced the square nails in the interior boards. The edges of the door got capped with strips of wood to hide the Vycor and plywood end-grain. The finished door
looks like a 100+ year old barn door made of two layers of vertical boards held together by clinched square nails...that it has a structural core of plywood waterproofed with Vycor will be a secret between you and I...
Fixing such damage is only a temporary repair unless the source of the problem is identified and addressed. Therefore I had to do something about the water coming off that roof. There wasn't enough room for a gutter above the door, so I made a sort of inverted drip edge from a sheet of copper with a V-shaped channel on one edge. To install it I removed the first three courses of slate from the roof:

This was relatively easy because the slates had been installed with slate hooks (usually reserved for repairs) instead of nails. My theory on this: the roofers were concerned about the uneven and flexible nature of the roof sheathing, and couldn't nail the slates for fear of them stressing and breaking over time. The sheathing boards are installed parallel to the rafters (see above), therefore the roof surface is far from flat and flexes a bit when the building is loaded with snow. Normally the sheathing would go horizontally, perpendicular to the rafters, and the slates would sit firmly over any irregularity between sheathing boards. But on the Weaving Shed the roof sags and bounces a lot between rafters, and snow on top would break the slates if they were nailed across an uneven seam, so the roofer used hooks to give the slates a greater degree of stress-free movement. There is a down-side to this method of slating which I'll discuss later. I installed the copper over the cedar shingles that formed the "drip edge", and put back the slates:

I hosed water onto the roof to test the new diverter and make sure I had it pitched downhill.
The only discernable change is the fact that the door now easily clears the threshold.
Special thanks to the Museum visitor who stopped to watch me work and ask whether they had Liquid Nails in 1850!