On a recent morning I visited the Vermont Association for the Blind and Visually Impaired. I attend their Peer Assisted Learning and Support (PALS) group in South Burlington a couple of times per year to talk about our Art at Hand tours and encourage their participants to visit Shelburne Museum. I always bring a hands-on art project based on the Museum's collections.
This most recent craft was inspired by the Stencil House. I have been been studying Stencil in preparation for our new gallery talk, Exploring Colonial Revival: Prentis and Stencil Houses, which debuts when the Museum opens to the public on May 12th. Wall stencils, painted by itinerant artists who traveled from town to town and worked on commission, were popular decorative features in American homes from approximately 1815 to 1840. Much of the painting in the Stencil House parlor is original, having been stenciled in the 1830s and cleaned in an extensive 1999-2000 conservation project.
Stencil House Parlor, Photograph by J. David Bohl
Stencil House Fireplace, Photograph by J. David Bohl
After introducing the house and describing in detail the stenciling above the fireplace in the parlor (see above), I oriented the PALS group to their art materials. Chalk pastels, which feel dry and powdery, are easy to blend. Oil pastels are waxy, like crayons. The pastel paper we drew on had some texture to hold the pigment. I also brought a variety of stencils in different shapes; animal, vegetable, mineral, we had it all.
Most of the folks who attend the PALS group have age-related vision impairments, such as macular degeneration or cataracts. They are not totally blind, and for the most part they do have a sense of light and color. Even so, the creative process is challenging. One participant, Jerry, said that though he'd never tried drawing, "recently I've been trying a lot of new things I've never done." Historically, people who are blind or visually impaired have felt alienated by the art world. We at Shelburne Museum are excited to play a small part in turning those perceptions around.
Click here to learn more about our tours for special audiences or to register for Art at Hand.
As I spent last week working in the Circus Building writing new cards for our Dive In With Webby program, which contain fun and interactive activities for visiting families of the museum, my eyes couldn’t stop from floating over to the circus posters.
During the Golden Age of the Circus in the late 19th and early 20th centuries, the enormous traveling companies relied heavily upon poster distribution to announce their upcoming arrival to towns across America and Europe. While trusty locomotives hauled the 100 plus rail cars of resting animals, actors, equipment and wagons; a team of men were sent ahead to plaster the upcoming town with circus posters. It was common for a town to get covered with 5,000 to 8,000 posters!
Shelburne Museum’s large collection of posters is loaded with colorful images of great feats of daring, dangerous animals from remote parts of the world, and unbelievable sideshow characters. The sensational writing is another big selling point, as even I find myself pining to see “Goliath the Monster Sea Elephant: The Greatest Sea Monster Ever Exhibited Alive” (27.4-236), or “The Human Projectile Hugo Zacchini: A Living Person Shot Through Space with Violent Velocity from the Mouth of a Monster Cannon” (27.4-251).
Not only are these posters fun to see, they’re also fun and very easy to make! Where will your imagination take you?
To complete this activity you will need:
A Piece of Paper (8.5x11 is a fine size, but don’t be afraid to make a big poster)
Colored Pencils
Markers
Pencil
Eraser
Stencils (Optional)
The seven stencils, several of which were traced from toys made by the Holtztiger company, are spread onto two pages. Click on either page to open it in a new web browser. You might need to edit the settings on your printer to ensure a successful print.
Directions
1. Print out the stencils and cut them out (optional).
2. Map out your poster using the pencil, eraser, and the optional stencils. Ask yourself, “If I owned a circus what part of my show would be irresistible to see?” Draw lightly so you can erase if you need to.
3. Still using your pencil and eraser, write a title for your poster as well as the name for your circus.
4. Using your markers or colored pencils, fill the poster with as much color as you possibly can!
Want to really get people’s attention? Create your own circus stencils using found objects from around the house. Find other materials to decorate your poster with – like glitter, paints, macaroni, etc.
Feel free to check out these photos of the circus poster I made to help you get started. Tune in next month for another fun art project, and don’t forget to check out the Circus Building or our Dive in with Webby program when the museum opens for the season on May 13th!
Starting now and continuing every month through our May opening, we will be posting popular family art activities from Owl Cottage and the Art on the Go Carts for you to try at home. We hope to inspire you to break out your art supplies on these dark winter days and create something special!
Pleissner, Clearing, Wyoming, 1932
Project: Constructed Landscapes
The landscape is a favorite artist's subject, and we have many of these scenes on view at the Museum. For this project, I "reconstructed" two of Ogden Pleissner's early landscape paintings.
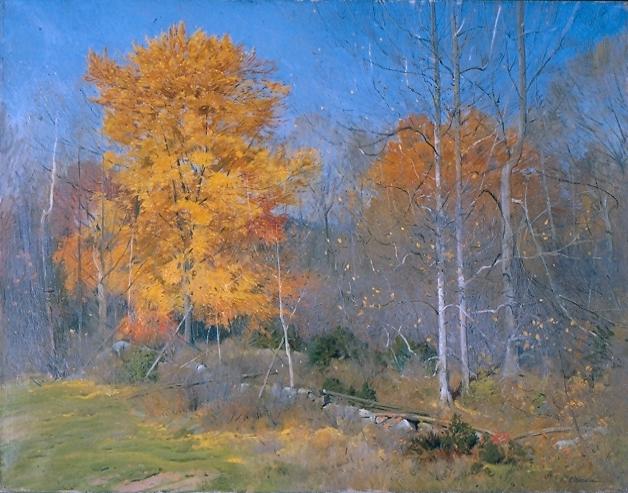
Pleissner painted Clearing, Wyoming (above) on a dude ranch in Dubois, Wyoming in 1932, where he and his wife spent seventeen summers. He completed Autumn, Lyme, Connecticut (below) in 1935. Both paintings are remarkable because Pleissner made them during the Great Depression, when he struggled to make a living as an artist.
Make a landscape collage out of materials you might find in a craft drawer or around the house. A landscape is a picture that shows a scene by land or sea. It can be real or make believe, but the subject is always nature--for example, fields, hills, forests, or water.
Directions:
1. Spread out tablecloths or newspaper. (This activity can be messy.)
2. Start with the poster board or card stock. You may want to sketch an idea in pencil first.
3. Choose materials for your project (see suggestions above and add some of your own!).
4. Arrange materials on the paper and then secure materials using glue sticks or tacky glue.
5. When the glue has dried, place the landscape collage on display for everyone to see.
You can see my pictures "under construction" below. Enjoy, and let us know how your Constructed Landscape goes! Be sure to check back in February for another fun art project, and don't miss Pleissner Gallery the next time you're at the Museum.