Showing posts with label Historic Buildings and Sites. Show all posts

Thursday, May 2, 2013

A Feel for Art

On a recent morning I visited the Vermont Association for the Blind and Visually Impaired. I attend their Peer Assisted Learning and Support (PALS) group in South Burlington a couple of times per year to talk about our Art at Hand tours and encourage their participants to visit Shelburne Museum. I always bring a hands-on art project based on the Museum's collections.
This most recent craft was inspired by the Stencil House. I have been been studying Stencil in preparation for our new gallery talk, Exploring Colonial Revival: Prentis and Stencil Houses, which debuts when the Museum opens to the public on May 12th. Wall stencils, painted by itinerant artists who traveled from town to town and worked on commission, were popular decorative features in American homes from approximately 1815 to 1840. Much of the painting in the Stencil House parlor is original, having been stenciled in the 1830s and cleaned in an extensive 1999-2000 conservation project.

Stencil House Parlor, Photograph by J. David Bohl
Stencil House Fireplace, Photograph by J. David Bohl
After introducing the house and describing in detail the stenciling above the fireplace in the parlor (see above), I oriented the PALS group to their art materials. Chalk pastels, which feel dry and powdery, are easy to blend. Oil pastels are waxy, like crayons. The pastel paper we drew on had some texture to hold the pigment. I also brought a variety of stencils in different shapes; animal, vegetable, mineral, we had it all.
Most of the folks who attend the PALS group have age-related vision impairments, such as macular degeneration or cataracts. They are not totally blind, and for the most part they do have a sense of light and color. Even so, the creative process is challenging. One participant, Jerry, said that though he'd never tried drawing, "recently I've been trying a lot of new things I've never done." Historically, people who are blind or visually impaired have felt alienated by the art world. We at Shelburne Museum are excited to play a small part in turning those perceptions around.


Click here to learn more about our tours for special audiences or to register for Art at Hand.

Thursday, October 11, 2012

i-loview, Accessible Technology!

This season Shelburne Museum received a generous gift from the Vermont-based accessible technology company, Ai Squared -- two i-loview handheld video magnifiers for  visually impaired museum visitors. Equipped with sophisticated cameras, the devices allow users to see an image up to 32 times its original size.

Intern Nina uses an i-loview magnifier on an Art at Hand tour of the Ticonderoga
We have put the magnifiers to good use in our Art at Hand program for the visually impaired. We've used them, for example, to see the tiny anchor pattern that dots the dining room carpet on the steamboat Ticonderoga. Later this month we will employ them at the General Store for up-close look at objects behind the counter or high up on the shelves. The i-loview magnifiers have been indispensable on these special tours.
Now, the devices are even more accessible to our visitors. Through closing day on October 28th they are available to check out at the Information Desk just behind the Museum Store!

Anne displays the i-loview magnifiers now available for visitors to check out at the Information Desk
I recently had the opportunity to speak with Rebecca White, Marketing Project Manager at Ai Squared, who wrote her own article about Art at Hand on their "Zoomed In" blog. She explains that while the company's flagship product, ZoomText magnification and reading software, has been on the market for over twenty years, the i-loview is an innovative development in accessible hardware. "We do everything we can to stay on top of technology," she says. "The i-loview helps our customers on the go--whether they're at the grocery store or an art museum." The device, White emphasizes, allows people who are visually impaired to "stay connected to the world and maintain their sense of independence."

White expresses a passionate belief that cultural institutions should be accessible to the tight-knit community of visually impaired Vermonters whom Ai Squared knows well. The company moved to the southern part of the state 1992 and, as she describes, its corporate culture just "feels Vermont." Then she pauses, realizing that, "maybe that only makes sense to Vermonters!" Certainly we at Shelburne Museum take pride in our deep regional connections and are glad to establish a partnership with such an esteemed local business. Ai Squared makes it a point to give back to the state they call home, and we thank them heartily for their generosity.

Update: If you'd like to learn more about Art at Hand, check out this article published in the Burlington Free Press on Sunday, October 21st.

Thursday, September 13, 2012

New Faces in Education

If you've been following Shelburne Museum on Facebook, Twitter, Flicker, or Youtube, you know that this is an exciting time here as the Museum builds a Center for Art and Education that will transform the Museum from seasonal to year round operation. With each steel beam that goes up, fresh possibilities arise.

We're very excited to bring on board two new faces who contribute to the positive energy and forward momentum that the promise of a year-round Shelburne Museum brings. Meet Daphne and Kim! Both began jobs in the Education Department this month.
Daphne Zencey, Academic Programs Coordinator

Daphne Zencey is the Museum's new Academic Programs Coordinator. She comes to us by way of the University of Vermont and Syracuse University, where she earned her master's degree in art history. She is also a veteran of the United States Coast Guard. This spring Daphne worked as an educator for Passport to Learning, our series of interactive workshops for grades K through 8. Her favorite session was "Shop 'til You Drop" at the General Store. She loved giving students a shopping list, items to barter, and a limited amount of play money and watching the "spontaneity and hubbub" that ensued. Daphne is looking forward to seeing school-aged kids on the grounds this fall, especially the littlest ones on their very first visit to the Museum who can't help but "gawk at everything around them."

A self-described "19th-century nut" who remembers the excitement of visiting the Metropolitan Museum as a child, Daphne adores European painting and completed her master's thesis on the Pre-Raphaelites. She also has a soft spot for decorative arts such as those at the Variety Unit, especially the unique collection of sailor-carved scrimshaw. An artist herself, Daphne likes to work with pastels and charcoal. "I dabble," she explains. We know her passion for art and hands-on experience will make an impact as she takes on the Academic Programs Coordinator position!

Kim McCray, Adult Programs Coordinator
Kim McCray is Adult Programs Coordinator. She has significant experience in the museum world with positions at the Smithsonian's National Postal Museum and the Nantucket Historical Association under her belt. She is currently working on a doctorate in museum education at Lesley University, having completed her undergraduate degree at St. Michael's College and her master's at Georgetown University. Her interest in museums goes back much farther. A lifelong Vermonter, she recalls a visit to the Fairbanks Museum in St. Johnsbury at age five to see dinosaur fossils as well as childhood trips to Shelburne Museum. 

As a young girl, Kim's favorite piece in the Museum's collection was Tinkle, a folk art painting of a proud-looking white cat completed in 1883 by an unknown American artist that visitors can view today in Stagecoach Inn. It still stands out to her, she explains, because Tinkle was important enough to his owner for him or her to commission a portrait. Kim's interest in American Folk Art spans many mediums, from paintings to whirligigs, but she is always inspired by stories of the unique individuals who crafted the pieces. A novice quilter, Kim also enjoys creating herself. She is excited to become part of the Shelburne Museum community and have the opportunity to put lifelong passion and academic theory into practice as our Adult Programs Coordinator.

Welcome, Daphne and Kim!

Wednesday, July 11, 2012

How Not To Be Seen

Before:
And after:
Contrary to the title, this is not a primer on how to hide oneself a la Monty Python, rather it is about how the Museum carpenters try to make their repairs invisible. In an earlier post I described how I built a brand-new replica of an historic building component, a willful departure from the original materials and appearance; this time I will show you how I rebuilt a door on the Weaving Shed and tried to make it look like I had never been there at all.

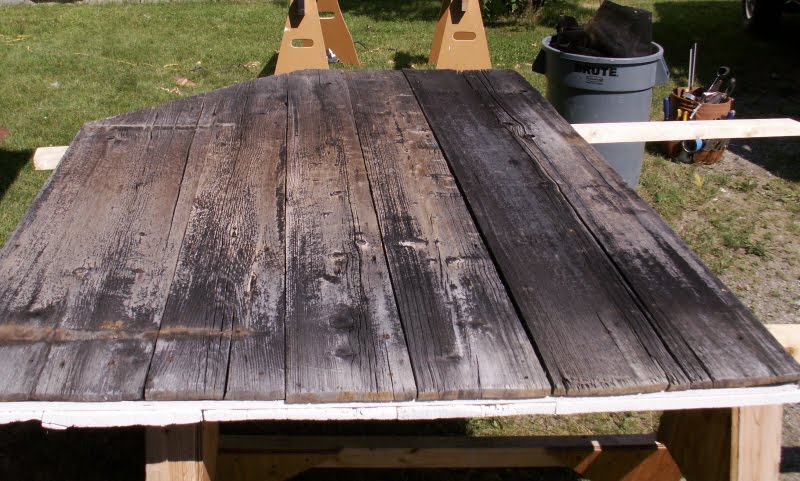
The problem at hand was that both doors had sagged downward and were binding on the threshold. A lot of force was needed to get them closed, and as a result the doors were severely racked on a twice daily basis as the building was opened and closed. Constructed of two layers of vertical barn boards nailed (with square nails) to a plywood core, the doors had the structural integrity of a fish's tail and made a similar motion as they moved. The boards had split exactly four feet out from the hinges. Since the doors are five feet wide, and a sheet of plywood is only four, there was a vertical seam in the plywood at this point. This weak point also corresponded to the drip line of the roof:
Since the doors are open rain or shine (when the Museum is open), the doors were getting a bit punky as a result of periodic watering.

Here I've removed the exterior boards and you can see the awesome fungus growing on the tar paper that covers the doors' plywood core:
And here you can see that the plywood was rotted as well:
Note the vertical plywood joint near the right edge: the inner sheathing board had split lengthwise directly over this line. There was tar paper on both sides of the door (under the barn boards): on the exterior to prevent water from penetrating the building; on the interior so the plywood wouldn't be visible through cracks and knot holes. This wood-tarpaper-plywood-tarpaper-wood sandwich trapped and held water from the roof in the middle of the door, hence the fish-tail action.

You're probably thinking, "Hang on a minute, what are modern materials like plywood and tar paper doing on such an old building???"

The Weaving Shed was built in 1955, but it looks much older because it was constructed of old materials the Museum crew salvaged from other structures in the region, leftover parts from other projects, and/or materials that were purchased specifically because they were old and unique (We still have stockpiles of wide barn boards, bricks, square nails, roofing slates, figured hardwoods, etc.) We can only speculate as to the exact time period that this building was intended to represent, but at first glance it looks like it's from the early 19th century. Closer inspection reveals some very contradictory clues...more on that later.

In order to replace the rotten plywood I had to completely disassemble the door. I decided to take the opportunity to make a few design changes. I also made the new plywood core from two pieces, but oriented the seam horizontally. This way the two layers of barn boards would act as battens to hold the door together. The cracked inner sheathing board was 17-inches wide. To get a replacement I dug around in the carpenter shop attic until I got one I liked, ripped it to width and cut it to length (Yes, it was too wide at 18.5 inches!) I laid out the interior boards on my saw horses with the whitewashed inner faces down and glued and screwed the new plywood to them with construction adhesive and short decking screws:


I had attached a strip of Vycor self-adhesive rubberized flashing tape to the top edge of the plywood core, first sticking it to the inner face and leaving the release paper on the rest of the strip. After fastening the plywood to the interior boards I covered the outer face of the plywood with tar paper and lapped the Vycor over the top:
This way, any water that drips from the roof will run over the Vycor and down the tar paper rather than soaking into the plywood core. I nailed the exterior boards on over the tar paper, again using square nails:
I then flipped the door over and replaced the square nails in the interior boards. The edges of the door got capped with strips of wood to hide the Vycor and plywood end-grain. The finished door looks like a 100+ year old barn door made of two layers of vertical boards held together by clinched square nails...that it has a structural core of plywood waterproofed with Vycor will be a secret between you and I...

Fixing such damage is only a temporary repair unless the source of the problem is identified and addressed. Therefore I had to do something about the water coming off that roof. There wasn't enough room for a gutter above the door, so I made a sort of inverted drip edge from a sheet of copper with a V-shaped channel on one edge. To install it I removed the first three courses of slate from the roof:
This was relatively easy because the slates had been installed with slate hooks (usually reserved for repairs) instead of nails. My theory on this: the roofers were concerned about the uneven and flexible nature of the roof sheathing, and couldn't nail the slates for fear of them stressing and breaking over time. The sheathing boards are installed parallel to the rafters (see above), therefore the roof surface is far from flat and flexes a bit when the building is loaded with snow. Normally the sheathing would go horizontally, perpendicular to the rafters, and the slates would sit firmly over any irregularity between sheathing boards. But on the Weaving Shed the roof sags and bounces a lot between rafters, and snow on top would break the slates if they were nailed across an uneven seam, so the roofer used hooks to give the slates a greater degree of stress-free movement. There is a down-side to this method of slating which I'll discuss later. I installed the copper over the cedar shingles that formed the "drip edge", and put back the slates:
I hosed water onto the roof to test the new diverter and make sure I had it pitched downhill.
The only discernable change is the fact that the door now easily clears the threshold.


Special thanks to the Museum visitor who stopped to watch me work and ask whether they had Liquid Nails in 1850!

Thursday, June 14, 2012

Teaching Shelburne Museum II: A Centennial Expo

A few weeks back I wrote about a partnership between Shelburne Museum, the Green Mountain Writing Project, and Turning Points in American History that encourages Vermont educators to use primary sources, including museum collections, when studying the Civil War and Reconstruction era. I promised to share more about the study group that meets at the Museum, including innovative ways that participating teachers are engaging their students with history. I had to look no further than the 1876 World's Fair, which arrived at the Museum on a sunny day this spring.

"Lamb & St. Lawrence Leech Co.," presented by Vermont educators Jennifer Theoret (pictured) and Cate Lamb, advertised historical remedies in the Apothecary Shop.
The Turning Points educators modeled their Centennial Exposition after National History Day, a competition in which students study a historic topic using a variety of primary and secondary sources and present their research in the form of a paper, performance, exhibit, website, or documentary. Our educators set up temporary exhibits around the Museum grounds on nineteenth-century topics including needlepoint samplers, the history of footwear, and Civil War-era amputation. 

They brought to life several objects that I had seen before but never studied, such as this prosthetic leg on display at the Doctor's Office upstairs in the General Store. I learned that amputations were increasingly common in the Civil War as a result of military advancements like the minie ball, a particularly destructive lead bullet used by the Union army. The Turning Points teachers also made compelling connections, as in the needlepoint display that linked the content of early American samplers to the unique roles that women played in the abolitionist movement. I was surprised to discover that explicit anti-slavery inscriptions appear on textiles dating as early as the 1830s.
A prosthetic leg at the General Store.
Each exhibit included a detailed lesson plan relating to the content of the exhibit to the elementary, middle, or high school classroom. My visit to the 1876 World's Fair was a unique opportunity to see Shelburne Museum's collection from a different angle, and it opened my mind to ever-new teaching possibilities. Stay tuned for a post about the Green Mountain Writing Project's role in this unique collaboration. Thank you, Turning Points!

Wednesday, April 11, 2012

Replicating the Work of a Bygone Era: Part 2

I set out to make a new four-foot wide louvered elliptical attic vent for the Variety building, I thought I would have a technological advantage over the original builder, and would have a relatively easy time of it. The original was white pine; I thought redwood would be a more weatherproof material (and we have lots of redwood scrap in the shop from helping Randy repair the Museum's redwood picnic tables). To get the two curved pieces that form the the ellipse I needed a board over seven inches wide, and we didn't have one. Chip had some leftover Atlantic white cedar (Chamaecyparis thyoides), a.k.a Atlantic white cypress, that was wide enough, and equally weatherproof, so I made the frame from that.
I used the big bandsaw to cut the curves, and a stationary belt sander to smooth them. I copied the mortise-and-tenon joinery from the original, but didn't risk splitting the wood by drilling holes and pegging the delicate joints...I used West System epoxy glue instead. I didn't have a board wide enough to make the bottom rail in one piece. Instead I made a separate piece for the center hub and glued it on with a curved caul (clamping block).
You can see the dados (slots) to hold the louvers. Before gluing up the new frame I taped the old and new pieces together and traced the location of the dados; I copied the angles with a bevel gauge. To cut them I used a fine-toothed handsaw (I prefer the Japanese style that cuts on the pull stroke), and a narrow chisel fashioned from a sharpened screwdriver. There is no easy way to do this with power tools. There are 81 of these dados on the vent, but working by hand was the only way to do it accurately.
The louvers were a real challenge: the dados on the center hub were angled about 12 degrees from the face, while the dados on the elliptical frame were angled 45 degrees. This meant the louvers had 33 degrees of twist. In order to twist the new redwood louvers I soaked them in water overnight and then cooked them in a microwave oven on "high" for 5 minutes. Thanks to Mirsad for this idea! Whenever you bend wood it is a good idea to bend it farther than you need, because it will spring back a bit as it dries. I made a bending form with one row of slots at 90 degrees and another at 45, this held the microwaved louvers at 45 degrees of twist until they dried. It is unlikely that the original builder had a microwave oven, but I think he could have done this with steam, or by using green wood.
It took a day and a half to fit the 40 louvers into the frame. Each one had to have different angles cut on each end, and each one was a different length and taper. I used a block plane to make the ends thin enough to fit snugly in the dados, and used a knife and a plane to taper the louvers flush to (in line with) the frame. Instead of nails I gave each dado a shot of epoxy to hold the louvers in place.
To make the trim strips that went around the ends of the louvers, I got some western red cedar (Thuja plicata) and Chip's Stanley 45 combination plane, with interchangeable cutters that can produce any shape you need. I needed to make two curved beads, one about twice as wide and tall as the other, but right next to each other.
I had to bend these strips to the curvature of the ellipse and the center hub, but they were too long to fit in the microwave. I built a steam chamber by attaching the wallpaper steamer from the Conservation Lab to a length of PVC pipe. After an hour of this, the shop smelled like a sauna, and the wood was pliable enough to bend around a curved form.
I produced a lot of kindling doing this, since the red cedar heartwood wouldn't quite bend far enough without snapping. The sapwood proved to be more flexible. The trim for the center hub was a different matter entirely. I couldn't get the trim stock to bend to such a tight curve no matter how much steaming, soaking, and microwaving; the asymetric double-bead profile made the wood twist every time.
The solution was presented by the original trim pieces, which the carpenter had kerfed (notched) every half-inch to facilitate bending. I did this to a piece of square stock, then soaked and microwaved it. To bend it, I screwed blocks of wood to the ends of a long band clamp, and wedged the trim stock between them. As it bent, the band clamp helped distribute the strain along the wood and prevented it from snapping. Thanks to Chip for this design!
It took a lot of clamps to attach the trim to the vent until the glued dried. Then it was time to shape the center hub trim.
The Stanley 45 was too big to make the turn, so I took the cutters out of it and made a "scratch plane" that I could steer more easily.
The trim pieces moved a lot as I was clamping them, so I made them longer than they needed to be and cut them to length once the glue had set. To avoid gluing the trim where I planned to cut it, I put clear packaging tape on the frame and glued the trim to that. Once it was cut to length, the excess trim could be removed by pulling off the tape. I fashioned the radial pattern on the center hub from redwood scraps, whittling them with a knife and smoothing the lines with a block plane. These got glued on as well.
Once everything had been glued, shaped, and sanded I submerged the whole unit in a trough of Flood oil and let it soak for an hour. This was less toxic than the original "finish" of creosote and lead paint, and really brought out the color in the cedar and redwood. I stapled brass screen on the back of the vent, and used the Genie lift to install it on the building.


It is easy to overlook the amount of time and skill required to produce many “architectural details” on old buildings. In this case, a mere attic vent took the better part of three weeks to replicate. While the original builders may have been faster since they weren’t trying to make an exact copy of someone else’s work, they probably did not have power saws, wallpaper steamers, epoxy glue and microwave ovens. While these tools certainly made parts of the job easier and faster, there was no modern substitute for the really important aspects of making delicate pieces of wood fit together well. The bulk of the work was done with saw, chisel, and plane; patience, a steady hand and a true eye—the same way it was done by the carpenter long ago.

Friday, March 23, 2012

Replicating the Work of a Bygone Era: Part 1

How did we go from this:
To this?
One of the challenges faced by the Museum carpenters is repairing the many old buildings here, and deciding when to replace, rather than repair something. Sometimes all we have to do is replicate how something was done 150 or more years ago, other times we can better preserve our buildings if we intentionally depart from the original construction. Either way requires careful study of the original to see how it was made, what made it last, and/or what made it fail. The attic vent from the Variety Unit was already severely weathered when squirrels tore through it. There was enough left of the old vent (an elliptical wooden fan) to see how it was made, but there was too much gone or worn out to repair it. I'd be practically rebuilding it, so I set out to make a replacement by copying the appearance of the old one while adding a few improvements. Here's what I learned about the old vent; in Part 2 I'll show you how I made the new one. (A note on scale: this thing is four feet wide, and 20 inches tall).
Right away I could see a few interesting details: the old vent had big square wrought nails driven through its joints as reinforcement. These were very rusty, and had clearly been in there a long time. The elliptical frame was assembled in halves, with a spline connecting them at the top of the arc. This meant that near the bottom of the arc the grain of the wood cut across the frame at a steep angle to the tenons that held it into the horizontal member--this was prone to splitting. It is easy to imagine that the frame split as it was being assembled, and rather than start over the builder just nailed it back together.
I could also see where the frame had split around the pegs that held the two halves of the ellipse to the top spline: the splits left dark marks where the spline was exposed to the weather. There were wrought nails all through this joint as well.
That spline was spiked to the center post, which filled the gap between the two topmost louvers. This meant that it was a three-dimensional wedge, wide at the top and beveled parallel to the louvers, yet thin enough at the bottom to fit between the louvers on the center hub. I think the spline was made from a separate piece because to be strongest its grain needed to be horizontal, yet had it been carved from the same stock used to make the center post the grain would have been vertical, and weak.
Despite the vintage fasteners used in its construction, the vent was attached to the building with round finish nails. Moreover, the white pine of the vent was much more deeply weathered than the surrounding clapboards and trim. This indicated that although this part of the building was built in the late 1940s, the vent was much older. Close inspection of the vent revealed why it was worth salvaging and re-using: all of its 59 separate pieces had been painstakingly cut and shaped by hand, and were held together by multiple tiny cut nails. The marks of a scratch awl (used to make layout marks instead of a pencil) were still visible, as were the marks of a very thin sawblade and a sharp knife.
Being hand cut, the elliptical frame was not a regular geometric shape, so each louver had been custom-fitted, with a slightly different length, width, and taper. To make things even more interesting, each louver was slightly twisted (maybe they were steam-bent, or perhaps the builder used green wood?). The louvers were set in narrow dados (slots) in the frame and held in by small nails and a curved trim strip that went all the way around the frame. There was another of these trim strips on the center hub, and in order to bend it to such a tight curve it had been kerfed (cut partway through with a saw) every half-inch, and each segment had a small nail in it.
The detail on the center hub looked like relief carving from the ground, but it turned out to be made up of thin diamond-shaped slivers that were also nailed on. There were only two left, but I could see the marks left by the others where the hub hadn't been worn down so much by the weather. Each of these was slightly different as well, suggesting they had simply been whittled to shape. Somebody with a lot of patience spent a long time making this thing!

Wednesday, December 7, 2011

Looking into the Light

Have you been considering using LED (light emitting diode) bulbs for your home or business? This rapidly-developing class of lighting fixture has generated quite a buzz. Since we've been researching and using LED bulbs in some of our galleries for about eight years now, other museums and collectors have been asking us if LEDs might be right for them too.
LED lights have illuminated the dollhouses and cases in the Variety Unit since 2004
Finding an exhibition design solution.
In 2004 Shelburne Museum installed LED lights in the Variety Unit's doll and scrimshaw cases primarily to solve an exhibition design challenge. While we'd prefer to keep lights out of the cases entirely, it just wasn't possible to light the objects from outside the cases given the relatively low ceilings in this 1835 building. The qualities we were looking for were: no ultraviolet content, low heat and even light. Director of Preservation and Conservation Rick Kerschner looked at a number of options and tested the most promising ones in a mock-up dollhouse room in the Conservation Lab.

Our mock-up dollhouse room with the monitor and some of the lighting options we considered
If you're interested in the details, he outlined his process in a presentation at the New England Archivists Meeting at Simmons College in 2008, now available as a podcast.

Ultimately, Rick settled on LED bar lights from Prolume. There were several reasons for selecting this company. Their bar-shaped fixture was a size and configuration that met our needs. The small company was also willing to create a light that was the appropriate color (3000 degrees K) and intensity to show off the collections to their best advantage. In addition, Prolume guaranteed that there would be no significant drop-off in the amount of light emitted from these bulbs for 10 years and that the light would not decrease by more than 50% for 15 years. Unfortunately this first generation of LED lights didn't live up to the estimated longevity and lost most of their light after only a few years of use. Prolume honored their guarantee and replaced all of the lights with their third generation LED bar lights containing diodes manufactured by Nichia. These new LED fixtures have been in place for over three years, and we have seen no loss in light intensity.

Note the differences in color among the first generation LEDs (top) versus the third generation LEDs (bottom). The diodes on the bottom are more uniform in color in contrast to the lights on the top. Its subtle, but it makes a difference.
So how many museum professionals does it take to screw in a light bulb?
In fall, 2010, Efficiency Vermont offered the museum a sweet deal - a full rebate on all the LED lights we cared to purchase (but only until December 31, 2010)! While conservators love free stuff just as much as anyone else, there were questions about the nature of the light emitted by LED lamps as compared to the more commonly used incandescent and halogen lights. We needed to know whether the light generated from the LEDs would be any more damaging than the light generated by the halogen lamps we were used to. Additionally we wondered if commercially available LED lights had the same color and intensity consistency that Rick had been only able to achieve for the Variety Unit cases by working directly with the manufacturer.

So as other institutions, including the National Gallery in London and the Getty Conservation Institute, were looking at commercially available bulbs in their labs to determine how the nature of light generated by an LED compared to fluorescent and incandescent lamps, Rick did some practical research in our galleries. He mocked up up comparisons and showed them to the electrician, exhibit designer, curators, director, and anybody else who had an interest in how the buildings were lit. Although Rick paid close attention to the color rendering index (CRI) of the LEDs, in the end, what was most important was how the artifacts actually appeared under the lights. Informed by the research done at other institutions and our own mock-ups, Shelburne Museum staff decided that the Philips EnduraLED MR16 and Sylvania UltraLED PAR 20 and PAR 30 LED replacement bulbs worked best for responsibly displaying our collections in our buildings with low ceilings.

Rick Kerschner, Exhibit Preparator Doug Oaks and Electrician Rick Gage have been generally pleased with the performance of these bulbs over the 2011 season. In total Shelburne Museum received over $50,000 worth of bulbs through Efficiency Vermont's "free LED" program. Rick estimates the yearly energy savings to be about $6,000; so payback will take about 10 years. Although the bulbs are rated for about 40,000 hours (or slightly more than 32 Shelburne Museum seasons) Rick is not convinced they will last that long. It remains to be seen how cost effective these bulbs really are.

More links to sources of information about using LEDs for exhibition lighting can be found on the American Institute for Conservation's website and within the LinkedIn Museum and Art Gallery Lighting discussion group. The Getty Conservation Institute's Guidelines for Selecting Solid State Lighting for Museums is available on request from their website.

Wednesday, November 30, 2011

The Turkeys Here Are Alright

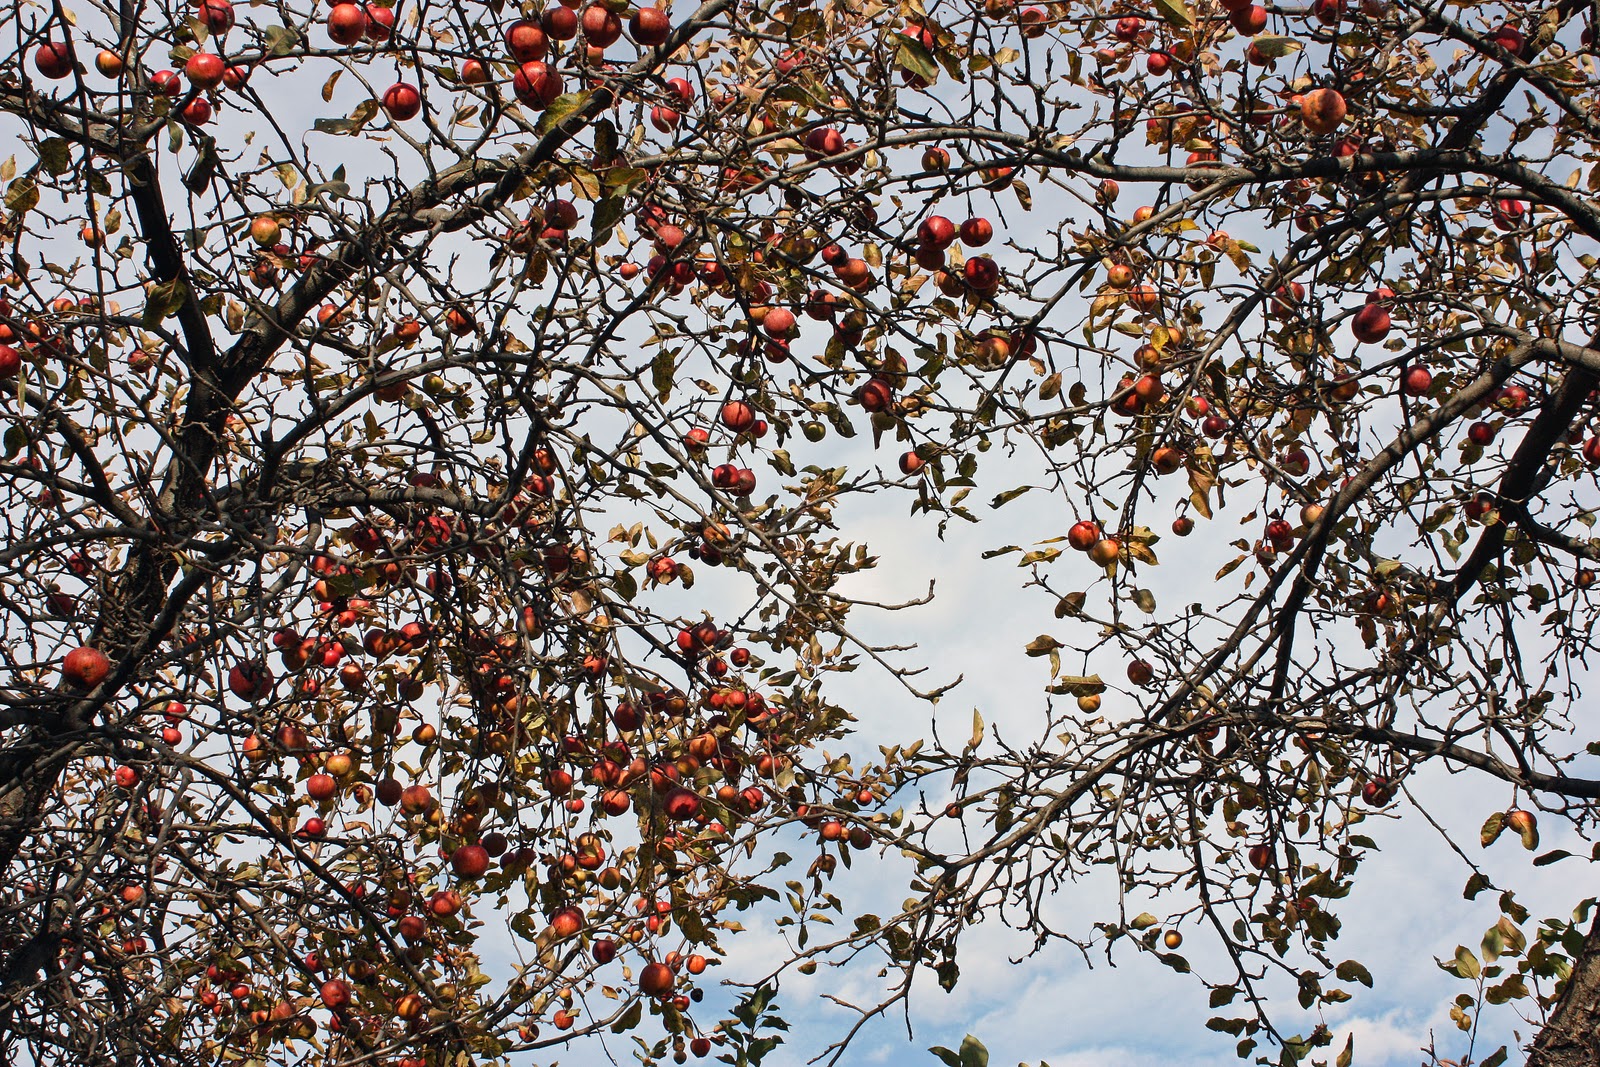
Our abundant apple trees: just another perk of the Museum's beautiful landscape in autumn.
Recently, I took a quick walk around the grounds on a sunny morning to do a bit of exploring and brainstorming. Although we're officially closed for the 2011 season, everyone around here continues business as usual. We've been preparing for the long winter ahead and yes, planning for next year already. This season was certainly memorable and excellent in many ways, and we thank everyone who made our incredible exhibits possible. We also would like to thank all the folks who came to visit and explore the museum throughout the summer!

Speaking of giving thanks, I stumbled upon something during my walk that is utterly appropriate to commemorate the holiday we just celebrated. It has to do with this building, the Horseshoe Barn. Look closely and maybe you'll see what I mean:
View of the barn: constructed here on the grounds from 1947-1949.
Take a closer look.
Yes, our folk art collection includes representations of the infamous turkey! Traditionally, Thanksgiving turkeys might appear on your dinner table but our sculptural examples live proudly on the exterior of the barn.

Gobble gobble...
This pair of turkeys is very similar to (and perhaps based off of) another pair of carved objects we have in the collection. The original folk art carvings are made from pine and coated in gesso and gilt paint:

27.FM-29 a-b; Pair of Turkey Carvings
Our turkey collection doesn't stop at folk art, however. We've also got some Audubon prints that are similarly themed:

1958-311.1; Wild Turkey by John James Audubon
 And here's another one, also by Audubon:

1958-311.2; Wild Turkey by John James Audubon
Of course, this season isn't just about the Turkey and the shopping deals. On behalf of the museum, we hope everyone enjoyed a safe and restful holiday.

...and possibly a few slices of some fresh apple pie.