Showing posts with label Woodworking. Show all posts

Wednesday, July 11, 2012

How Not To Be Seen

Before:
And after:
Contrary to the title, this is not a primer on how to hide oneself a la Monty Python, rather it is about how the Museum carpenters try to make their repairs invisible. In an earlier post I described how I built a brand-new replica of an historic building component, a willful departure from the original materials and appearance; this time I will show you how I rebuilt a door on the Weaving Shed and tried to make it look like I had never been there at all.

The problem at hand was that both doors had sagged downward and were binding on the threshold. A lot of force was needed to get them closed, and as a result the doors were severely racked on a twice daily basis as the building was opened and closed. Constructed of two layers of vertical barn boards nailed (with square nails) to a plywood core, the doors had the structural integrity of a fish's tail and made a similar motion as they moved. The boards had split exactly four feet out from the hinges. Since the doors are five feet wide, and a sheet of plywood is only four, there was a vertical seam in the plywood at this point. This weak point also corresponded to the drip line of the roof:
Since the doors are open rain or shine (when the Museum is open), the doors were getting a bit punky as a result of periodic watering.

Here I've removed the exterior boards and you can see the awesome fungus growing on the tar paper that covers the doors' plywood core:
And here you can see that the plywood was rotted as well:
Note the vertical plywood joint near the right edge: the inner sheathing board had split lengthwise directly over this line. There was tar paper on both sides of the door (under the barn boards): on the exterior to prevent water from penetrating the building; on the interior so the plywood wouldn't be visible through cracks and knot holes. This wood-tarpaper-plywood-tarpaper-wood sandwich trapped and held water from the roof in the middle of the door, hence the fish-tail action.

You're probably thinking, "Hang on a minute, what are modern materials like plywood and tar paper doing on such an old building???"

The Weaving Shed was built in 1955, but it looks much older because it was constructed of old materials the Museum crew salvaged from other structures in the region, leftover parts from other projects, and/or materials that were purchased specifically because they were old and unique (We still have stockpiles of wide barn boards, bricks, square nails, roofing slates, figured hardwoods, etc.) We can only speculate as to the exact time period that this building was intended to represent, but at first glance it looks like it's from the early 19th century. Closer inspection reveals some very contradictory clues...more on that later.

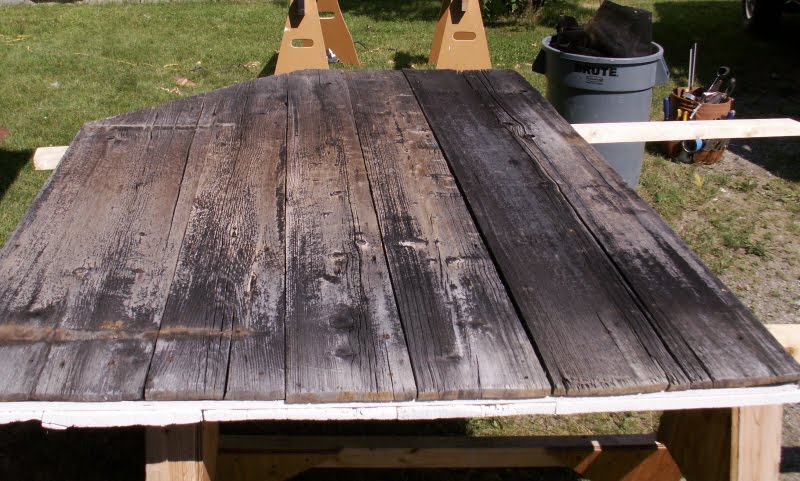
In order to replace the rotten plywood I had to completely disassemble the door. I decided to take the opportunity to make a few design changes. I also made the new plywood core from two pieces, but oriented the seam horizontally. This way the two layers of barn boards would act as battens to hold the door together. The cracked inner sheathing board was 17-inches wide. To get a replacement I dug around in the carpenter shop attic until I got one I liked, ripped it to width and cut it to length (Yes, it was too wide at 18.5 inches!) I laid out the interior boards on my saw horses with the whitewashed inner faces down and glued and screwed the new plywood to them with construction adhesive and short decking screws:


I had attached a strip of Vycor self-adhesive rubberized flashing tape to the top edge of the plywood core, first sticking it to the inner face and leaving the release paper on the rest of the strip. After fastening the plywood to the interior boards I covered the outer face of the plywood with tar paper and lapped the Vycor over the top:
This way, any water that drips from the roof will run over the Vycor and down the tar paper rather than soaking into the plywood core. I nailed the exterior boards on over the tar paper, again using square nails:
I then flipped the door over and replaced the square nails in the interior boards. The edges of the door got capped with strips of wood to hide the Vycor and plywood end-grain. The finished door looks like a 100+ year old barn door made of two layers of vertical boards held together by clinched square nails...that it has a structural core of plywood waterproofed with Vycor will be a secret between you and I...

Fixing such damage is only a temporary repair unless the source of the problem is identified and addressed. Therefore I had to do something about the water coming off that roof. There wasn't enough room for a gutter above the door, so I made a sort of inverted drip edge from a sheet of copper with a V-shaped channel on one edge. To install it I removed the first three courses of slate from the roof:
This was relatively easy because the slates had been installed with slate hooks (usually reserved for repairs) instead of nails. My theory on this: the roofers were concerned about the uneven and flexible nature of the roof sheathing, and couldn't nail the slates for fear of them stressing and breaking over time. The sheathing boards are installed parallel to the rafters (see above), therefore the roof surface is far from flat and flexes a bit when the building is loaded with snow. Normally the sheathing would go horizontally, perpendicular to the rafters, and the slates would sit firmly over any irregularity between sheathing boards. But on the Weaving Shed the roof sags and bounces a lot between rafters, and snow on top would break the slates if they were nailed across an uneven seam, so the roofer used hooks to give the slates a greater degree of stress-free movement. There is a down-side to this method of slating which I'll discuss later. I installed the copper over the cedar shingles that formed the "drip edge", and put back the slates:
I hosed water onto the roof to test the new diverter and make sure I had it pitched downhill.
The only discernable change is the fact that the door now easily clears the threshold.


Special thanks to the Museum visitor who stopped to watch me work and ask whether they had Liquid Nails in 1850!

Wednesday, April 11, 2012

Replicating the Work of a Bygone Era: Part 2

I set out to make a new four-foot wide louvered elliptical attic vent for the Variety building, I thought I would have a technological advantage over the original builder, and would have a relatively easy time of it. The original was white pine; I thought redwood would be a more weatherproof material (and we have lots of redwood scrap in the shop from helping Randy repair the Museum's redwood picnic tables). To get the two curved pieces that form the the ellipse I needed a board over seven inches wide, and we didn't have one. Chip had some leftover Atlantic white cedar (Chamaecyparis thyoides), a.k.a Atlantic white cypress, that was wide enough, and equally weatherproof, so I made the frame from that.
I used the big bandsaw to cut the curves, and a stationary belt sander to smooth them. I copied the mortise-and-tenon joinery from the original, but didn't risk splitting the wood by drilling holes and pegging the delicate joints...I used West System epoxy glue instead. I didn't have a board wide enough to make the bottom rail in one piece. Instead I made a separate piece for the center hub and glued it on with a curved caul (clamping block).
You can see the dados (slots) to hold the louvers. Before gluing up the new frame I taped the old and new pieces together and traced the location of the dados; I copied the angles with a bevel gauge. To cut them I used a fine-toothed handsaw (I prefer the Japanese style that cuts on the pull stroke), and a narrow chisel fashioned from a sharpened screwdriver. There is no easy way to do this with power tools. There are 81 of these dados on the vent, but working by hand was the only way to do it accurately.
The louvers were a real challenge: the dados on the center hub were angled about 12 degrees from the face, while the dados on the elliptical frame were angled 45 degrees. This meant the louvers had 33 degrees of twist. In order to twist the new redwood louvers I soaked them in water overnight and then cooked them in a microwave oven on "high" for 5 minutes. Thanks to Mirsad for this idea! Whenever you bend wood it is a good idea to bend it farther than you need, because it will spring back a bit as it dries. I made a bending form with one row of slots at 90 degrees and another at 45, this held the microwaved louvers at 45 degrees of twist until they dried. It is unlikely that the original builder had a microwave oven, but I think he could have done this with steam, or by using green wood.
It took a day and a half to fit the 40 louvers into the frame. Each one had to have different angles cut on each end, and each one was a different length and taper. I used a block plane to make the ends thin enough to fit snugly in the dados, and used a knife and a plane to taper the louvers flush to (in line with) the frame. Instead of nails I gave each dado a shot of epoxy to hold the louvers in place.
To make the trim strips that went around the ends of the louvers, I got some western red cedar (Thuja plicata) and Chip's Stanley 45 combination plane, with interchangeable cutters that can produce any shape you need. I needed to make two curved beads, one about twice as wide and tall as the other, but right next to each other.
I had to bend these strips to the curvature of the ellipse and the center hub, but they were too long to fit in the microwave. I built a steam chamber by attaching the wallpaper steamer from the Conservation Lab to a length of PVC pipe. After an hour of this, the shop smelled like a sauna, and the wood was pliable enough to bend around a curved form.
I produced a lot of kindling doing this, since the red cedar heartwood wouldn't quite bend far enough without snapping. The sapwood proved to be more flexible. The trim for the center hub was a different matter entirely. I couldn't get the trim stock to bend to such a tight curve no matter how much steaming, soaking, and microwaving; the asymetric double-bead profile made the wood twist every time.
The solution was presented by the original trim pieces, which the carpenter had kerfed (notched) every half-inch to facilitate bending. I did this to a piece of square stock, then soaked and microwaved it. To bend it, I screwed blocks of wood to the ends of a long band clamp, and wedged the trim stock between them. As it bent, the band clamp helped distribute the strain along the wood and prevented it from snapping. Thanks to Chip for this design!
It took a lot of clamps to attach the trim to the vent until the glued dried. Then it was time to shape the center hub trim.
The Stanley 45 was too big to make the turn, so I took the cutters out of it and made a "scratch plane" that I could steer more easily.
The trim pieces moved a lot as I was clamping them, so I made them longer than they needed to be and cut them to length once the glue had set. To avoid gluing the trim where I planned to cut it, I put clear packaging tape on the frame and glued the trim to that. Once it was cut to length, the excess trim could be removed by pulling off the tape. I fashioned the radial pattern on the center hub from redwood scraps, whittling them with a knife and smoothing the lines with a block plane. These got glued on as well.
Once everything had been glued, shaped, and sanded I submerged the whole unit in a trough of Flood oil and let it soak for an hour. This was less toxic than the original "finish" of creosote and lead paint, and really brought out the color in the cedar and redwood. I stapled brass screen on the back of the vent, and used the Genie lift to install it on the building.


It is easy to overlook the amount of time and skill required to produce many “architectural details” on old buildings. In this case, a mere attic vent took the better part of three weeks to replicate. While the original builders may have been faster since they weren’t trying to make an exact copy of someone else’s work, they probably did not have power saws, wallpaper steamers, epoxy glue and microwave ovens. While these tools certainly made parts of the job easier and faster, there was no modern substitute for the really important aspects of making delicate pieces of wood fit together well. The bulk of the work was done with saw, chisel, and plane; patience, a steady hand and a true eye—the same way it was done by the carpenter long ago.

Friday, March 23, 2012

Replicating the Work of a Bygone Era: Part 1

How did we go from this:
To this?
One of the challenges faced by the Museum carpenters is repairing the many old buildings here, and deciding when to replace, rather than repair something. Sometimes all we have to do is replicate how something was done 150 or more years ago, other times we can better preserve our buildings if we intentionally depart from the original construction. Either way requires careful study of the original to see how it was made, what made it last, and/or what made it fail. The attic vent from the Variety Unit was already severely weathered when squirrels tore through it. There was enough left of the old vent (an elliptical wooden fan) to see how it was made, but there was too much gone or worn out to repair it. I'd be practically rebuilding it, so I set out to make a replacement by copying the appearance of the old one while adding a few improvements. Here's what I learned about the old vent; in Part 2 I'll show you how I made the new one. (A note on scale: this thing is four feet wide, and 20 inches tall).
Right away I could see a few interesting details: the old vent had big square wrought nails driven through its joints as reinforcement. These were very rusty, and had clearly been in there a long time. The elliptical frame was assembled in halves, with a spline connecting them at the top of the arc. This meant that near the bottom of the arc the grain of the wood cut across the frame at a steep angle to the tenons that held it into the horizontal member--this was prone to splitting. It is easy to imagine that the frame split as it was being assembled, and rather than start over the builder just nailed it back together.
I could also see where the frame had split around the pegs that held the two halves of the ellipse to the top spline: the splits left dark marks where the spline was exposed to the weather. There were wrought nails all through this joint as well.
That spline was spiked to the center post, which filled the gap between the two topmost louvers. This meant that it was a three-dimensional wedge, wide at the top and beveled parallel to the louvers, yet thin enough at the bottom to fit between the louvers on the center hub. I think the spline was made from a separate piece because to be strongest its grain needed to be horizontal, yet had it been carved from the same stock used to make the center post the grain would have been vertical, and weak.
Despite the vintage fasteners used in its construction, the vent was attached to the building with round finish nails. Moreover, the white pine of the vent was much more deeply weathered than the surrounding clapboards and trim. This indicated that although this part of the building was built in the late 1940s, the vent was much older. Close inspection of the vent revealed why it was worth salvaging and re-using: all of its 59 separate pieces had been painstakingly cut and shaped by hand, and were held together by multiple tiny cut nails. The marks of a scratch awl (used to make layout marks instead of a pencil) were still visible, as were the marks of a very thin sawblade and a sharp knife.
Being hand cut, the elliptical frame was not a regular geometric shape, so each louver had been custom-fitted, with a slightly different length, width, and taper. To make things even more interesting, each louver was slightly twisted (maybe they were steam-bent, or perhaps the builder used green wood?). The louvers were set in narrow dados (slots) in the frame and held in by small nails and a curved trim strip that went all the way around the frame. There was another of these trim strips on the center hub, and in order to bend it to such a tight curve it had been kerfed (cut partway through with a saw) every half-inch, and each segment had a small nail in it.
The detail on the center hub looked like relief carving from the ground, but it turned out to be made up of thin diamond-shaped slivers that were also nailed on. There were only two left, but I could see the marks left by the others where the hub hadn't been worn down so much by the weather. Each of these was slightly different as well, suggesting they had simply been whittled to shape. Somebody with a lot of patience spent a long time making this thing!